-
Getting Started
-
Garmin Devices
-
Setup
-
Manage
-
Data Collection
- Collect Data: Synchronization Types
- Collect Data: Tablet Sync (multi-sync) with "Fitrockr Hub (Multi-Sync)" app
- Collect Data: Smartphone Sync (single-sync) with Garmin Connect app
- Collect Data: Overview
- Collect Data: Smartphone Sync (single-sync) with Fitrockr app
- Collect Data: Sync via USB cable to Laptop
- Collect Data: Smartphone Sync (single-sync) with Omron Blood Pressure Monitors
-
Track
-
Analyze
-
Other
-
Trouble Shooting
-
Definitions
-
FAQ
Collect Data: Tablet Sync (multi-sync) with "Fitrockr Hub (Multi-Sync)" app
Quick access links:
Software Pre-requisite | Hardware Pre-requisite | QR-Code / Join-Code | App Configuration | Pair Garmin Devices | Sync Garmin Devices via Bluetooth | Sync Garmin Devices via Cable | Sync Offline (Multi-Sync Only) | Remove Garmin Devices | Reassign Users | Check Sync Log | Check Settings
Software Pre-requisite
The Fitrockr Hub (Multi Sync) app is only available for Android. We recommend using Google Pixel phone or tablet for best compatibility and performance.
Hardware Pre-requisite
The Operator Sync scenario requires an Android tablet or Android smartphone. It is not compatible with iOS devices. The following Android devices are tested and verified:
Tablets
Google Pixel Tablet (best compatibility and performance)
Samsung Galaxy Tab A9 (8GB RAM version) or higher (slower performance, sync will take longer compared to Google Pixel)
Smartphones
- Google Pixel 7 or higher
Each tablet/smartphone can connect up to 20 Garmin devices.
QR-Code / Join-Code
Pre-requisite to sync with the Fitrockr Hub (Multi Sync) app is a Fitrockr project. Create a project in the Fitrockr Research & Control Center and generate the “Multi-Sync Tablet QR-Code”.
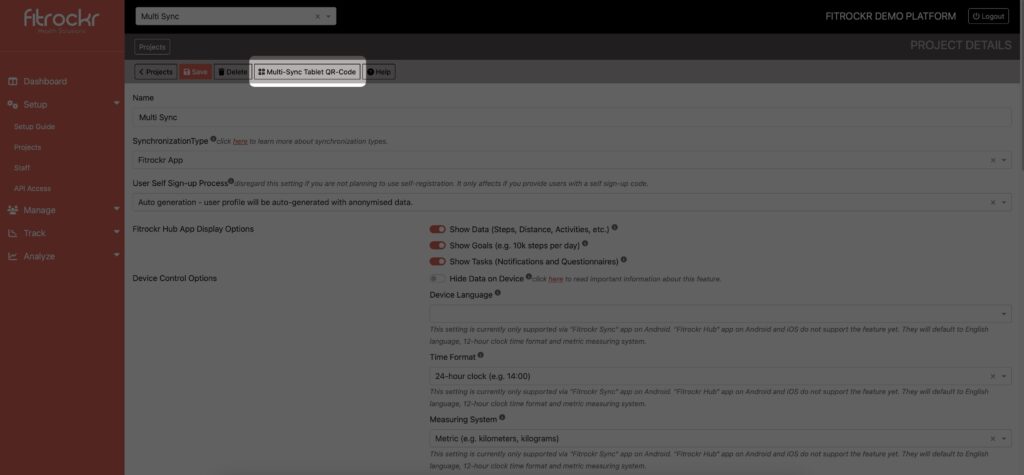
App Configuration
(1) update Garmin device firmware (https://www.fitrockr.com/help-center/prepare-wearable-devices/). This is not needed if you migrate from the old “Fitrockr Hub” app.
(2) factory reset Garmin device. This is not needed if you migrate from the old “Fitrockr Hub” app.
(3) download the FITROCKR HUB (MULTI-SYNC app from the Google Play Store.
There are several Fitrockr apps on the store. Do not mistakenly download the wrong one.
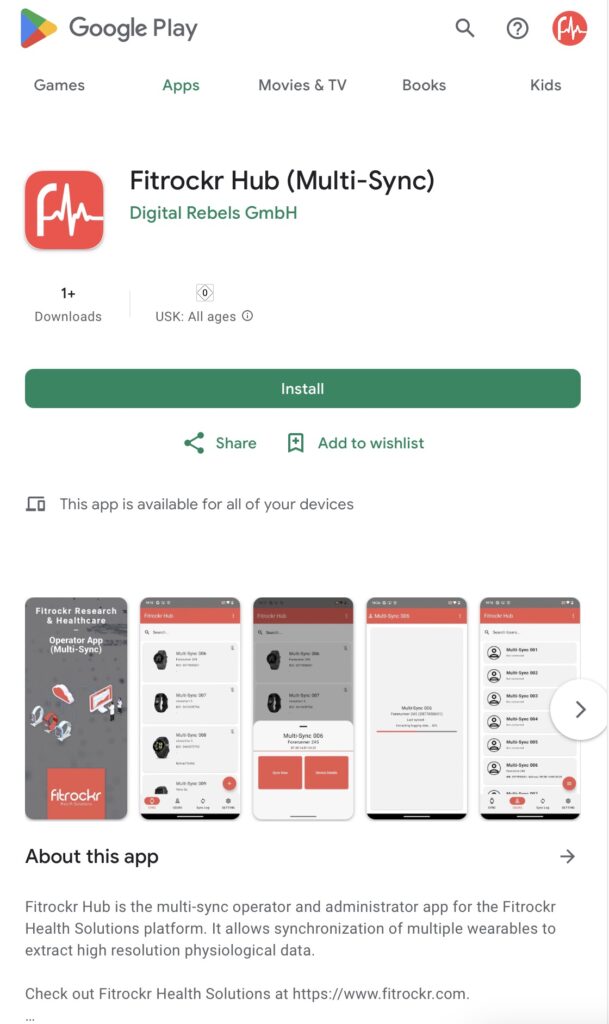
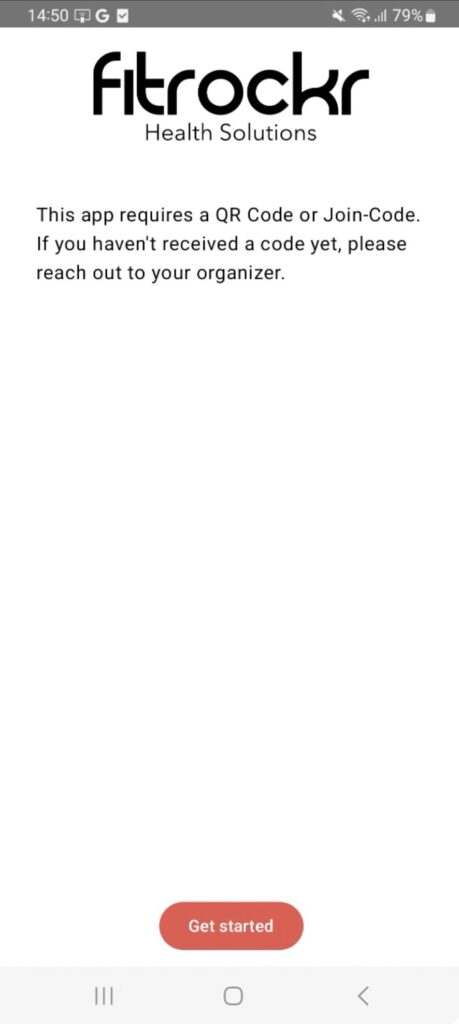
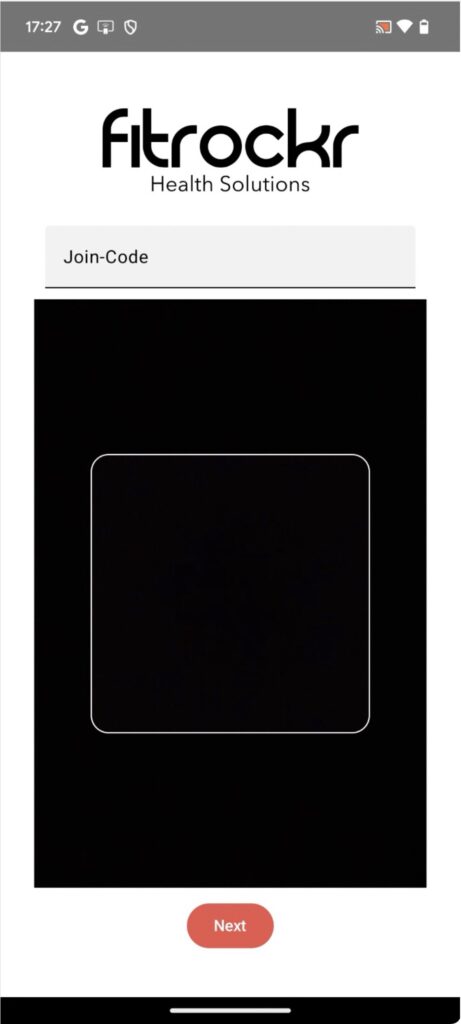
(4) open the Fitrockr Hub (Multi-Sync) app and select GET STARTED.
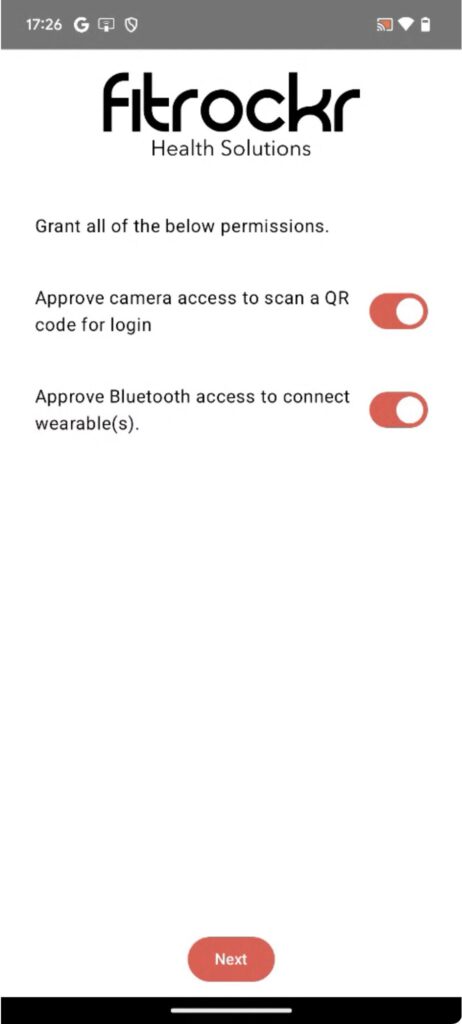
(5) grant all permissions and click NEXT.
(6) scan “Multi-Sync Tablet QR-Code” or manually enter code.
Pair Garmin Devices
(1) go to SYNC and click (+) icon.
This will show all Garmin devices nearby that are in pairing mode. If you do not see your devices, click on (x) and try again or enable pairing mode on the Garmin device.
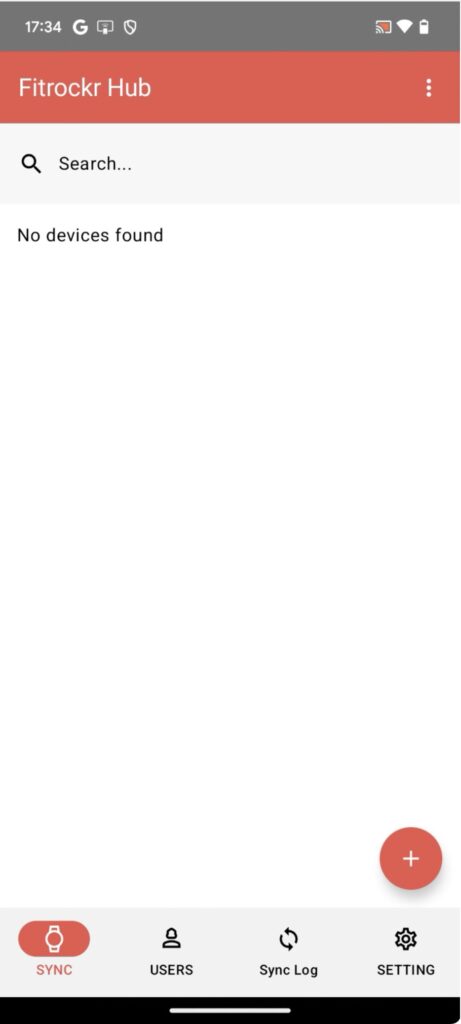
(2) select the device to be paired.
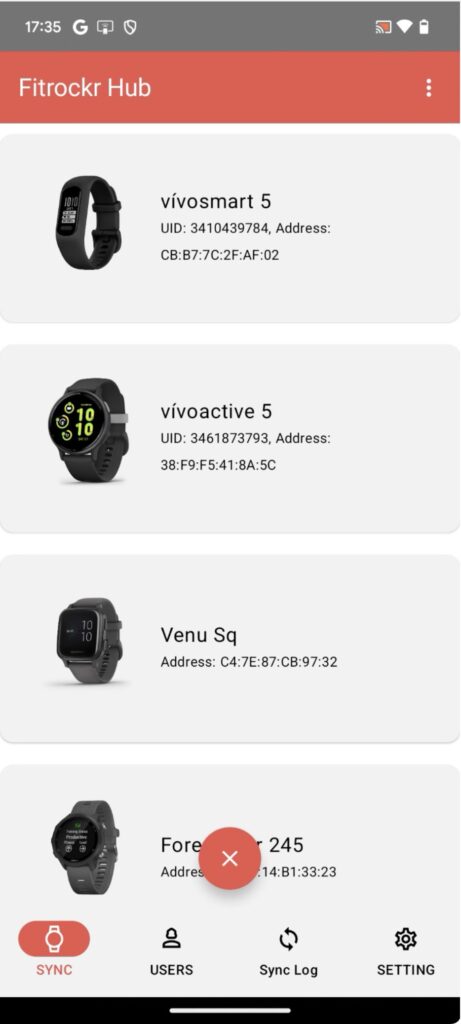
(3) select the user to be assigned to the device.
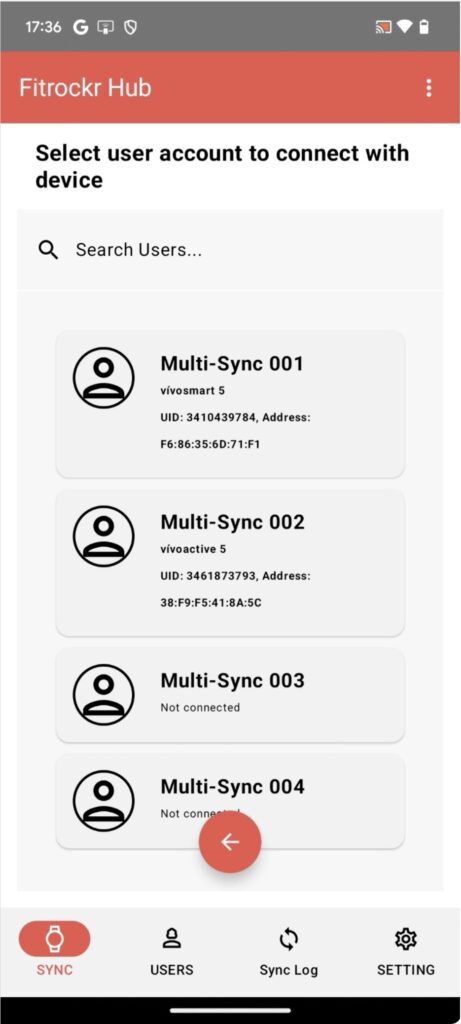
(4) enter pairing pin displayed on device.
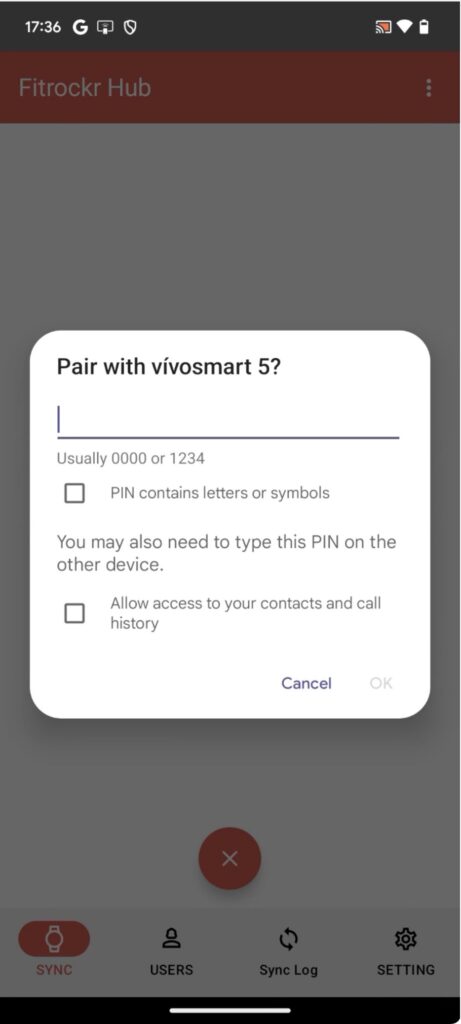
(5) wait until pairing is completed. If applicable, approve any further consents that may pop up.
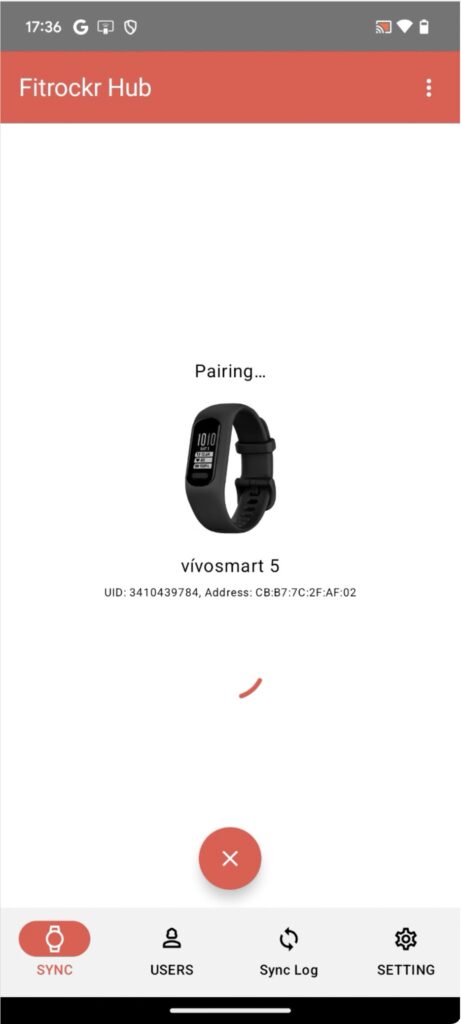
(6) select the device and then SYNC to transfer project settings.
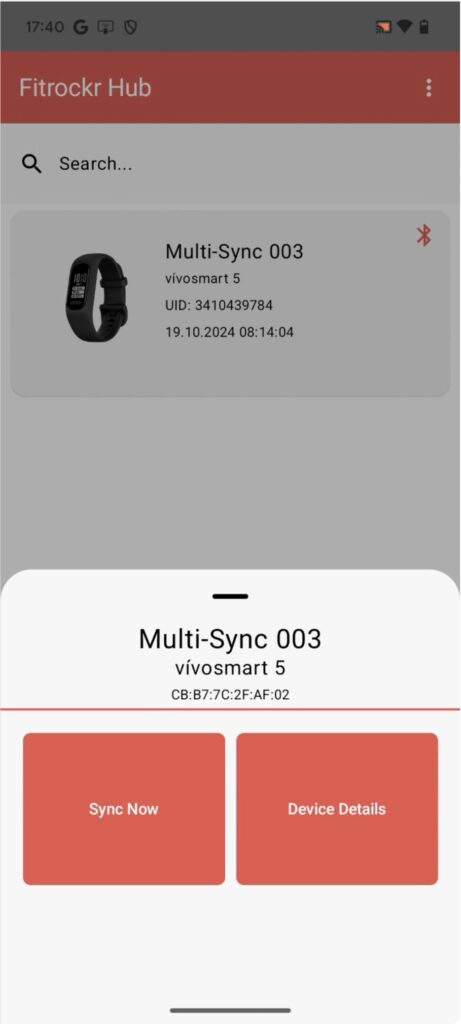
(7) select the device again and then DEVICE DETAILS to check its settings.

(8) scroll down and check whether Data Logging matches your project settings. If not, sync again until settings are successfully transferred to the device.
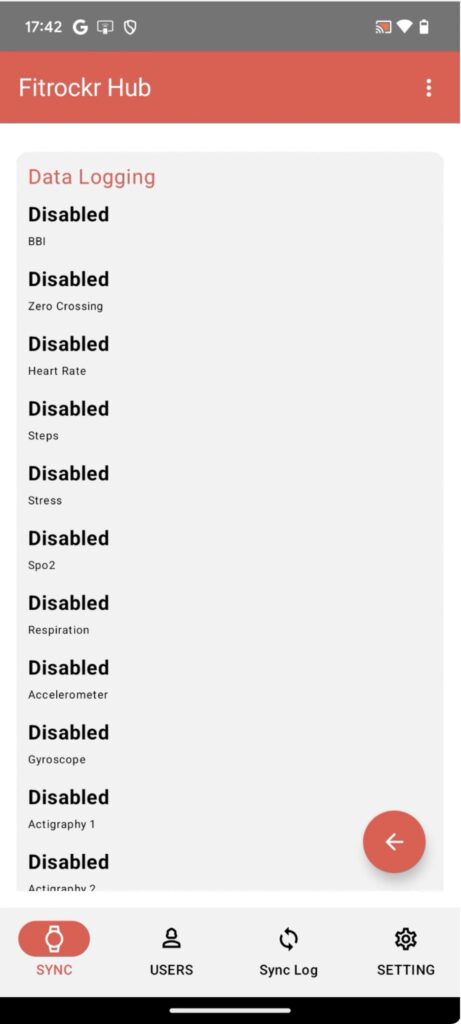
(9) pair further Garmin devices if applicable. We recommend not to pair more than 20 Garmin devices with one Android phone/tablet.
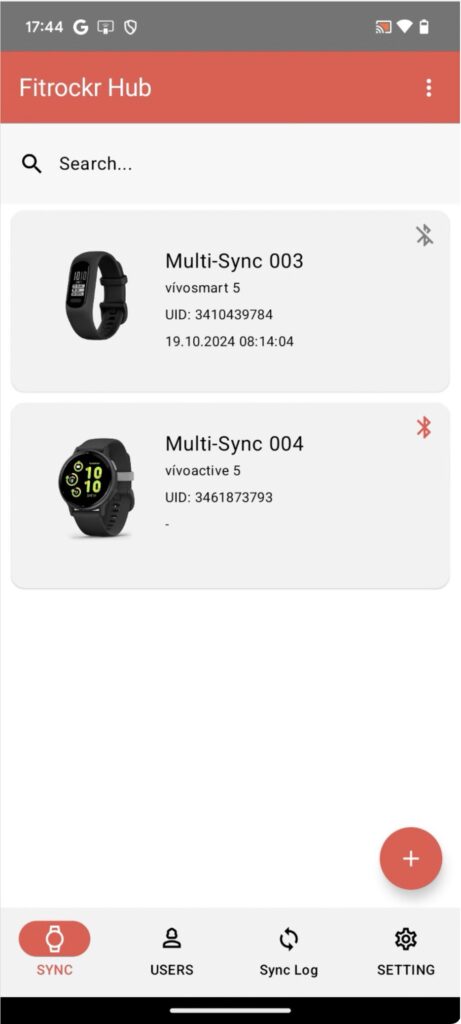
Sync Garmin Devices via Bluetooth
(1) select the device and then SYNC to sync the device.

(2) wait until sync has completed.
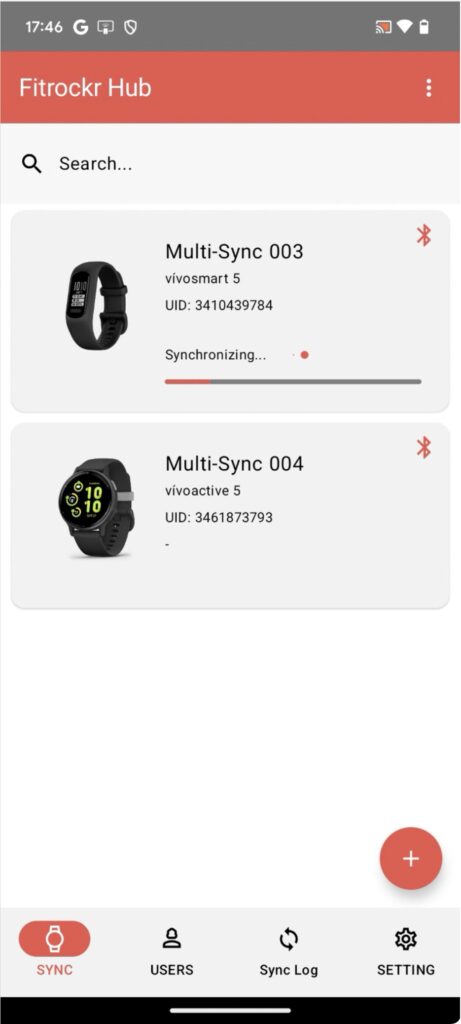
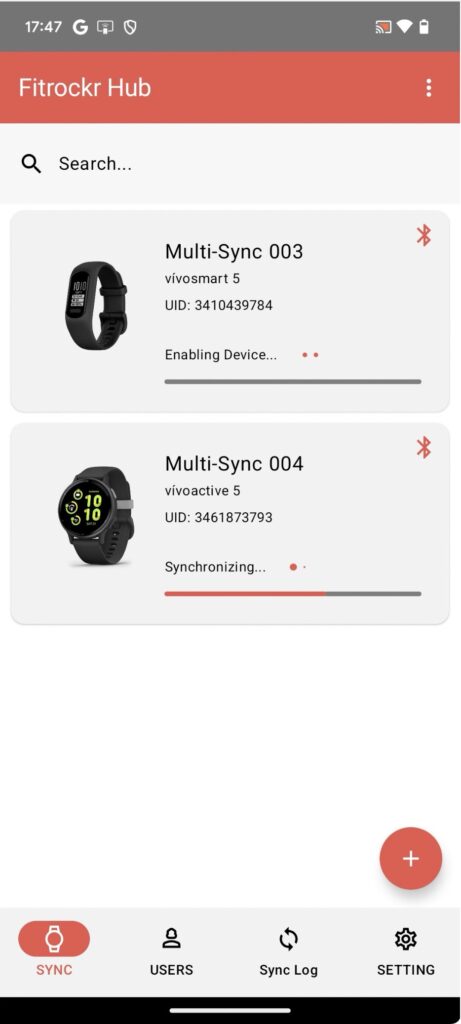
(3) it is okay to initiate syncs for multiple devices at the same time. The app will process them one by one.
Sync Garmin Devices via Cable
Cable synchronization is a much faster synchronization than via Bluetooth. It is particularly recommended for large data sets as Bluetooth can take a long time and may even become unstable.
(1) open the Fitrockr (Multi-Sync) app.

(2) connect Garmin device with its charging cable to phone/tablet. Tick the checkbox and confirm the popup message.
You need to be fast as the message only appears for 3 seconds. Reconnect cable if you need to try again.
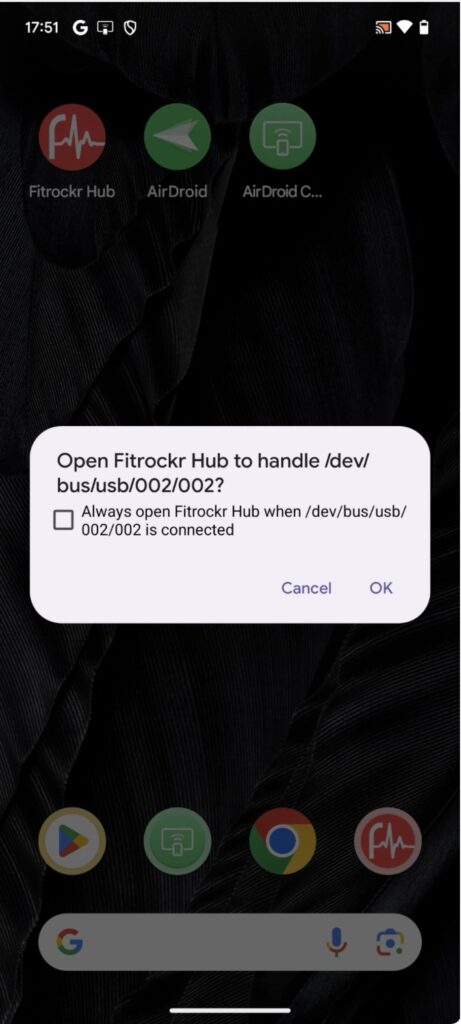
(3) wait until Garmin device is responding.
Vivosmart 5 devices must be manually set to “Mass Storage” on the device (Settings > System > USB Mode) to be recognized.
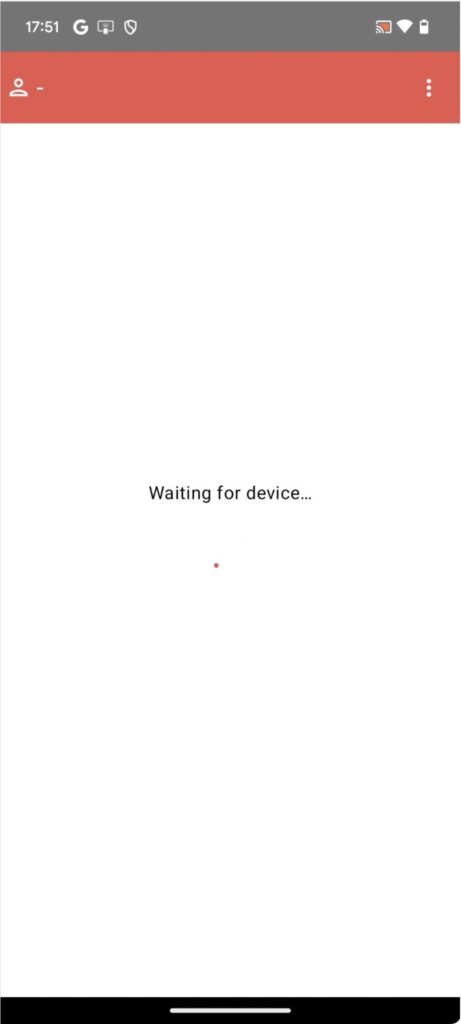
(4) wait until “Loading user information…” appears.
The process may get stuck at this stage for many Android OS versions.

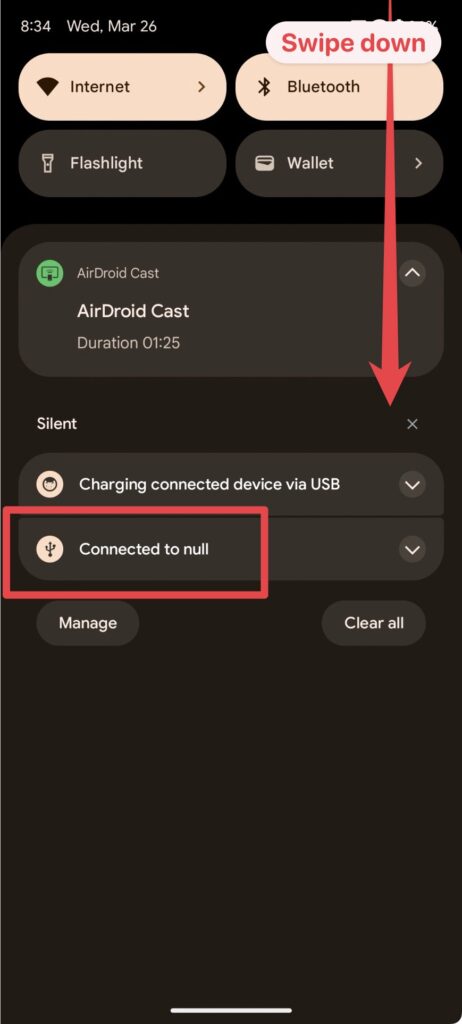
(5) pull down notifications menu by swiping down from the right top.
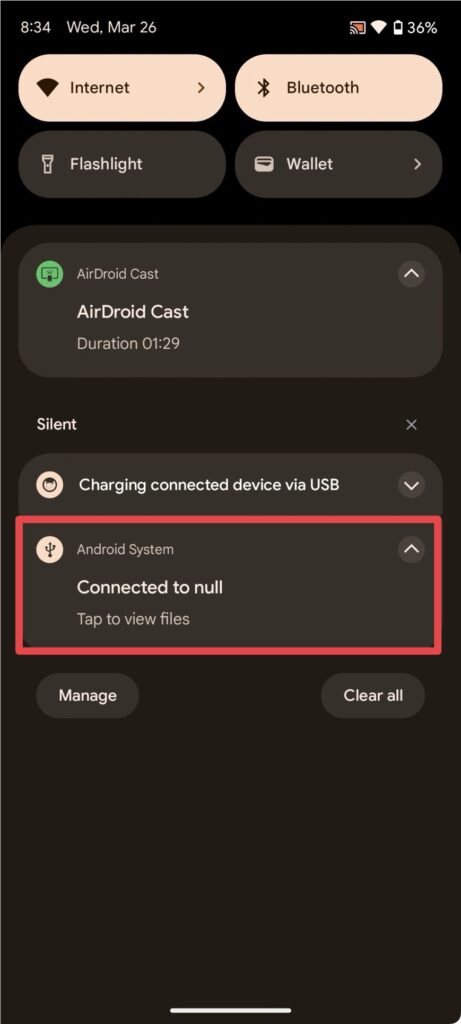
Click on the “Connected to null” entry.
(6) the entry will expand. Click on it again.
(7) select “Fitrockr Hub” and then “Always”.
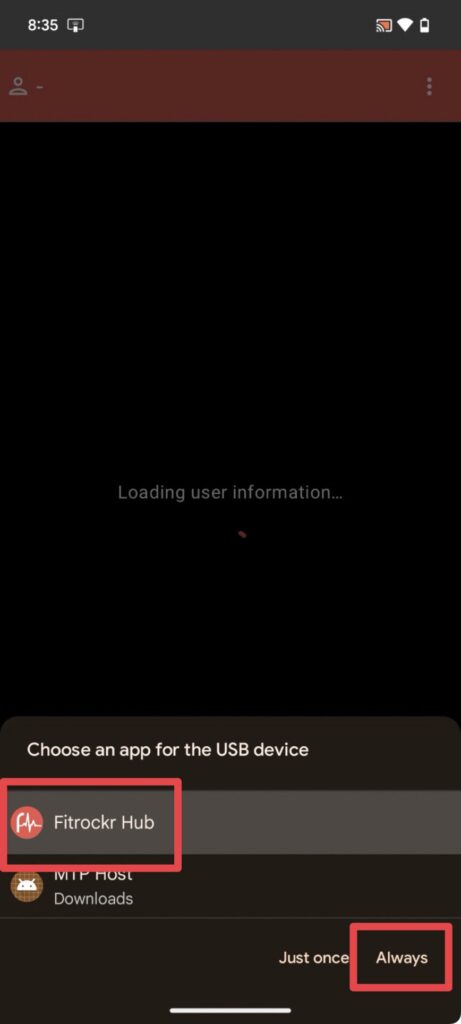
(8) sync will now start.
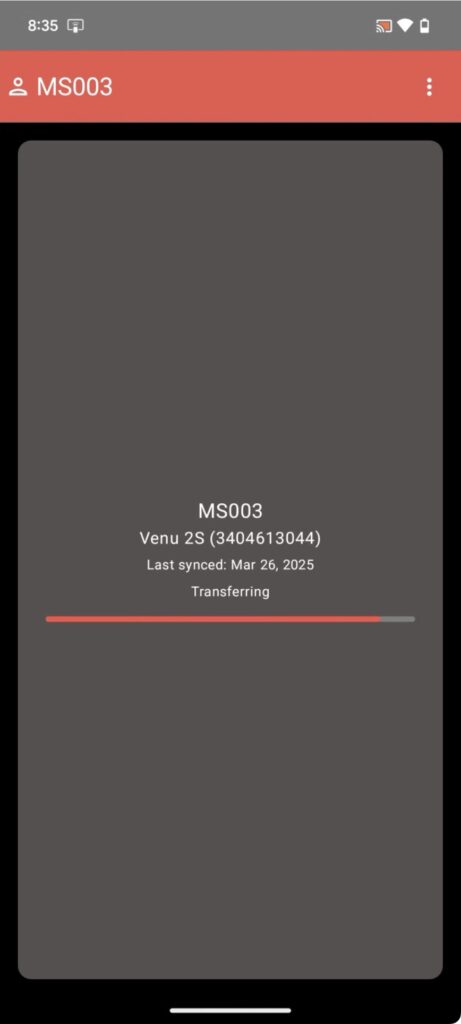
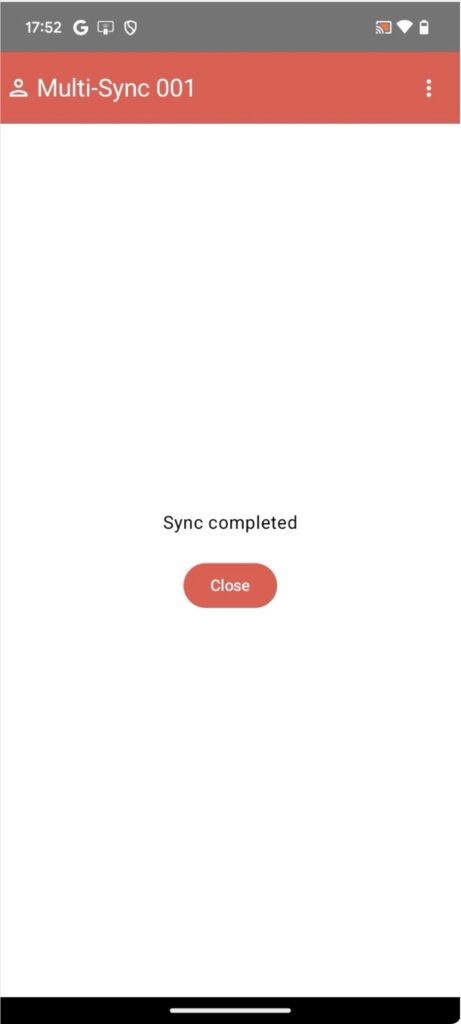
(9) select CLOSE when sync has completed.
Sync Offline (Multi-Sync Only)
You have the ability to Sync the devices even when offline. The Device can sync via Bluetooth onto your phone or tablet and the data will remain there until you are able to connect to wifi again. Upload will happen automatically when reconnected to wifi.
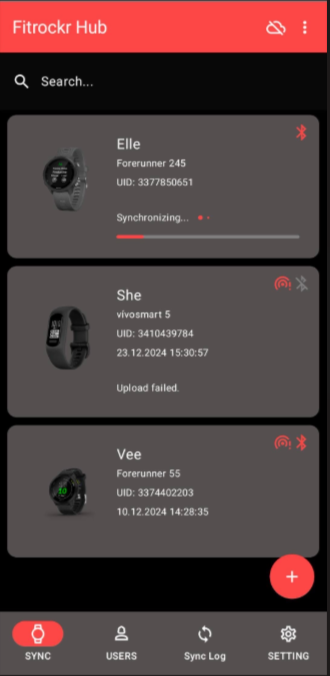
The first thing you will notice is the cloud icon in the top right: This indicates that the Hub App is not longer connected to the internet.
Once you click ‘Sync Now’ on a device, you will notice a small red icon appear in the top right corner of the selected Garmin device: This ‘Data Icon’ means that the Sync has worked, there is offline data available and that data will upload once you are reconnected to wifi.
You may also notice the Bluetooth icon appears in red: When the bluetooth icon turns red, it means that there are active Bluetooth connections available.
The Data Icon will disappear once you have re-connected to the internet and the data has been uploaded to the Fitrockr platform.
If the offline data isn’t pushed automatically, you can tap the device and manually upload the data once you have wifi.
Remove Garmin Devices
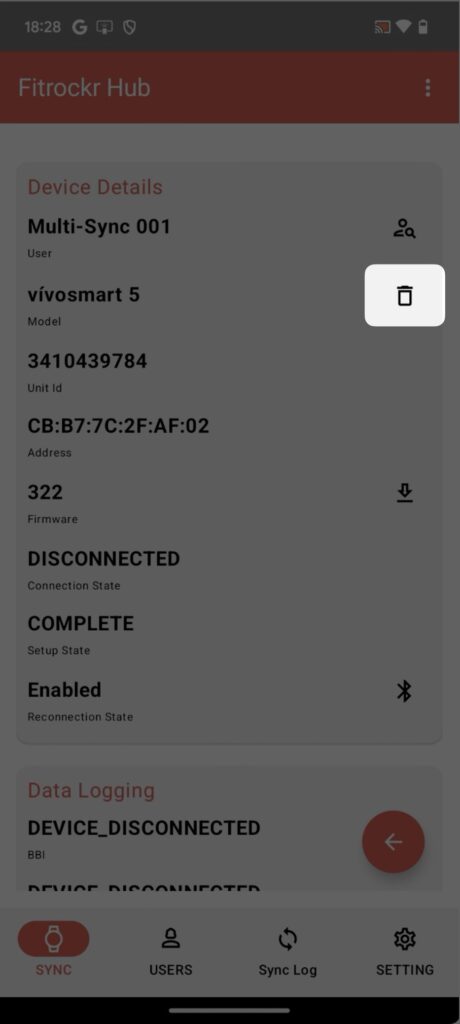
(1) select the device and then DEVICE DETAILS.

(2) click on the trash icon to remove it.
Reassign Users
(1) select the device and then DEVICE DETAILS.

(2) click on the user icon.
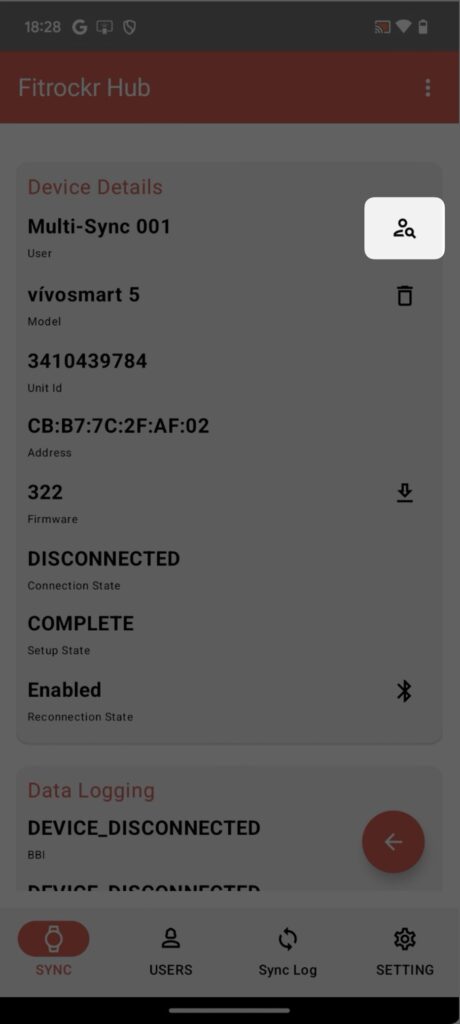
(3) select the new user to be assigned to the device.

Check Sync Log
Sync log can be viewed both in the app or in the Fitrockr Research & Control Center.
Check Settings
Settings show all project settings.